Once you’ve decided to carry a weapon for protection, you’ll probably want to test out a few different carrying positions. Comfort is an important factor in holster selection, especially if you spend a lot of time driving each day. Carrying inside the waistband (IWB) is common for many people, but drawing from an IWB holster can be difficult when you’re seated.
Whether you want a solution for while you’re driving or just want to test out a different way to carry your gun, follow our guide to learn how to make a leg holster. With just a few materials, some of which you may already have on hand, you’ll be wearing your leg holster in no time.
MATERIALS
If you have a few spare minutes, you can easily convert a waistband holster into a leg holster. Chances are you already have some of the materials you’ll need. To make your own leg holster, gather the following items:
- Gun belt – If you don’t already own a high-quality gun belt, consider purchasing one like this leather belt from Relentless Tactical. Fashion belts aren’t sturdy enough to support a holster and gun without sagging, so you should consider investing in a good gun belt.
- 2 to 3 adjustable nylon belts with a buckle – You can choose to have either one or two nylon belts wrapped around your thigh, and then you’ll need one more to attach the thigh holster to your gun belt. This nylon belt from JASGOOD is a quality, affordable option for this project.
- A pre-curved holster – A holster that’s slightly curved will be more comfortable than a straight-edged one. 1791 makes a great leather option, but feel free to choose any holster you like. Also, consider using a holster with two belt loops so it’ll sit tight to your leg.
- Scissors – You’ll trim the nylon belts once you get them sized correctly, so have a sharp pair of scissors on hand.
HOW TO MAKE A LEG HOLSTER: STEP-BY-STEP
Step 1) Create Your Thigh Strap
With your empty holster laying in front of you, thread one of the nylon belts through the belt loop(s). We’ll refer to this belt as the horizontal belt throughout the remainder of the guide. You could use a holster with a clip in a pinch, but loops will be more secure when you’re moving.
One belt will be adequate to anchor the holster to your leg, but two would make it even more secure if you’re in a situation where you’ll be moving around quite a bit.
To add a second belt, simply repeat the first step and thread the second horizontal belt right on top of the first.
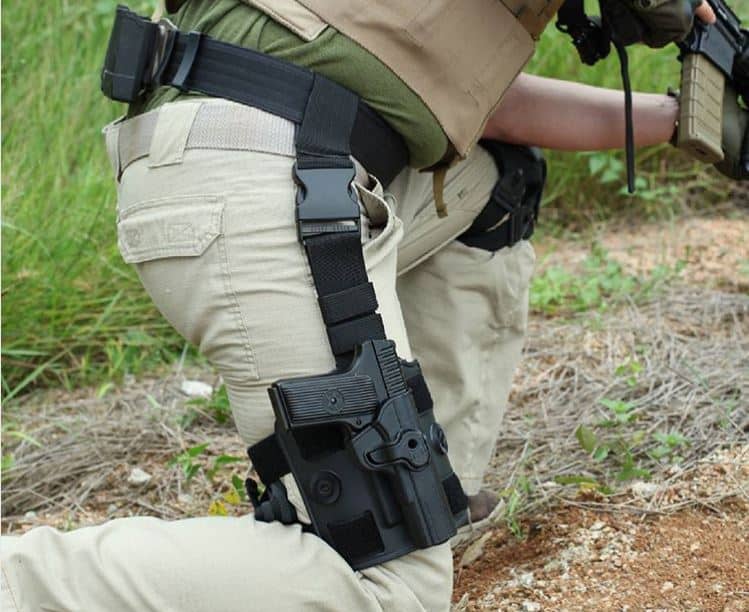
Step 2) Attach the Horizontal Belts to Your Leg
Whether you’re using one horizontal belt or two, wrap the belt(s) around your thigh. If you’re using two belts, wrap one of them high on your thigh and the other low.
You want to be sure that you attach the holster at a height you can easily reach. Let your hand hang loosely at your side and place the holster where your hand naturally rests on your outer thigh. Tighten the belt(s) to be secure but comfortable.
3) Trim the Horizontal Nylon Belt(s)
Once you’ve secured the nylon belt(s) to your thigh, cut the excess material off the belt(s). You’ll want to leave a little bit, maybe an inch or two, at the end to make sure you have something to grip each time you cinch your holster onto your leg.
It’s not required that you cut off the excess, but we strongly recommend it. You could tuck the extra length under the tightened belt(s), but it may come loose and interfere with your draw.
4) Put Your Gun Belt On
Thread your gun belt through the belt loops on your pants, but don’t tighten it yet.
5) Attach the Vertical Nylon Belt
We’ll use the last nylon belt to attach the thigh holster to your gun belt. We’ll refer to this belt as the vertical belt throughout the remainder of the guide.
Loop your vertical belt over the top of your gun belt. Keep going with the vertical belt and thread it around the horizontal nylon belt(s) at your thigh. Then, tighten and clasp the vertical belt.
At this point, you can cinch your gun belt around your waist.
6) Trim the Vertical Nylon Belt
Test the position of the holster on your outer thigh. Does it still sit right where your hand rests when you relax it at your side? Put an unloaded gun in the holster and practice drawing and holstering it. Does it feel natural, or are you stretching to reach the holster? Adjust the height as needed by tightening or loosening the vertical belt.
When you’re sure you like where the holster sits on your leg, trim any excess material off of the vertical belt. Be sure to leave an extra inch or two so you have something to grip when you pull it tight in the future.
Congratulations! You’ve just made your own leg holster. None of the pieces are permanently attached to each other, so you can deconstruct and reconstruct your leg holster as needed.
RELATED QUESTIONS
What do I do if I don’t have a holster yet? If you don’t currently own a holster, don’t worry! You can 100% DIY this project by making the holster portion out of duct tape.
Can I wear a holster on each leg? You sure can! If you own a high-quality gun belt, it should be able to support the weight of two holsters.
What kind of guns can I carry in a leg holster? The belts you used for this project can easily be taken off of one holster and added to another, so you can use this guide for any holster and gun combination you’d like.
Where can I wear my leg holster? Check your state’s laws about open carry before you wear this holster out of the house.
CONCLUSION
Whether you want to wear a leg holster for comfort or just because it looks neat, we hope you enjoyed our guide on how to make a leg holster. Having versatility in how you carry a weapon will ensure that no matter the situation, you’ll have a way to protect yourself.
If you enjoyed this article you’ll probably like these: