A nice painted scope is a great way to personalize and stay camouflaged. You don’t need to pay a higher price for a factory painted scope. Do it yourself and save some money while being able to choose the colors and pattern yourself and match it up perfectly with your rifle.
There are also techniques for a permanent and non-permanent paint job, so you can adjust your color or change it when you want to. Follow these steps to learn exactly how to paint a rifle scope and some of the different methods you can use.
Some Things You Will Need
Scope – Either just your scope or everything you want to paint together such as rifle, scope rings, whatever else. Just make sure everything is disassembled and covered properly so that you can paint each item individually and protect parts that must be protected.
A Couple Colors Of Spray Paint – Most of the time we want to do a camouflaged paint job on our scopes for the sake of camouflage, but this works for just black too. Browns, tans, and earth green tones, maybe some black, is what you are going for here. You can adjust your colors however you need to to get the look you want. Maybe a pink camo? Also, you want to use paints that are flat or matte, not glossy.
Blue Painters Tape – This tape is easy to remove, but scotch tape or duct tape work as well. Make sure you tape off everything that you do not want painted. Lenses are critical, but also areas such as adjustment knobs, anything that has to move for operation. I would also protect any labeling such as valuation numbers, serial numbers, etc.
Tissue – Using tissue it a great idea for added lens protection. Just wad it up close to the lenses and pale your tape over the top. That way if some paint does happen to seep under the tape, your lenses are saved by the tissue.
Exact-O Knife – This is for cutting out small, precise shaped pieces of tape or trimming close to the scope without damaging it. It is not 100% necessary, but it’s good to have one on hand just in case.
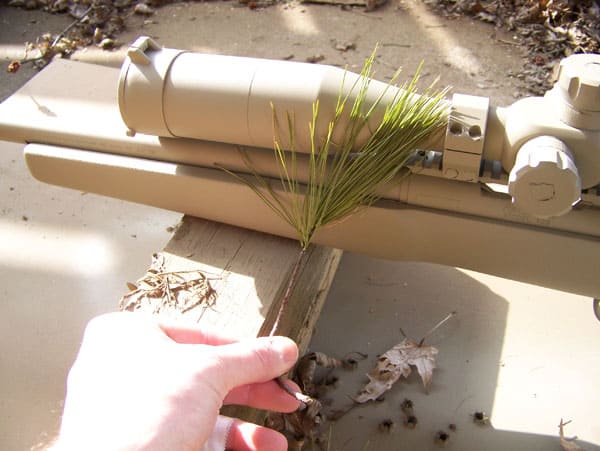
Patterning Object – This could be whatever you plan to use for patterning. A large leaf or leaves, netting, some small branches, anything that will transfer the pattern you’re looking for.
How To Paint A Rifle Scope
There are several different methods of painting a rifle scope, none of which are wrong. Some of these are more permanent than others. For a “permanent” paint job, you would want to use a Cerakote firearm coating. Another easy method is to use a product called GunSkins which goes on like a sticker or a wrap around your scope.
For this guide, we will focus on the simplest and cheapest method with the easiest to obtain materials. That is to simply spray paint the scope in the pattern and colors that you want.
You still want to obtain a good quality, long lasting and tough paint, but it still will be way more affordable than a Cerakote job, and you’ll be able to find a wide variety to chose from at any hardware store!
Step 1 – Prepare Your Scope
The first thing you want to do is do a good wipe down of your scope. It should be clean, but you want to make sure there are no oily residues or dust on the scope body that would affect the bonding of the paint.
Step 2 – Tape Off
Once the scope is wiped down and clean, gently place some wadded up tissue into the lenses and tape them in. This will protect the lenses from any paint that may inadvertently creep under the tape. Make sure you tape well and in as straight of lines as possible to get a more professional looking job.
Tape around both lenses, adjustment knobs, and any labeling or number values you need to be visible. Tape off anything that you do not want covered by paint. Now you are ready to paint!
Step 3 – Base Coat
Chose a good base color, like earth green or tan and coat the scope evenly. Spray paint while moving your arm for a more even coat and to avoid drip marks. Most spray paints dry pretty quickly, but just make sure the base coat is dry before applying the next colors.
Step 4 – Patterning
Set whatever you are using to pattern your scope with across the scope and spray paint with a secondary contrasting color. You will re-position several times to break up the colors. Repeat this step when the paint is dry in a third color, and as many times and colors as you wish to get the desired contrast.
Step 5 – Finish
Let your scope dry and remove all of the tape. Make sure all knobs and moving parts function properly and double check your lenses to make sure they are still clean. You are finished!
Common Questions
Will my paint job wear off? – Yes, unless you do a permanent type paint job, it will eventually wear off. Probably not right away though, and will last longer with a higher quality paint that’s designed to withstand wear.
Should I clear-coat after painting? – Yes. You don’t have to, but a clear-coat finish will make the paint last longer. Just make sure to get a matte or flat clear-coat, or you will still get the shiny effect.
Conclusion
Painting your scope is a fun, easy way to personalize or camouflage your scope and break up the reflective shininess that could otherwise ruin your concealment, or just make the scope match your rifle. With these steps, you now know how to paint a rifle scope yourself to save a little money and make it exactly what you want it to look like. Happy hunting!
If you enjoyed this article you’ll probably like these: