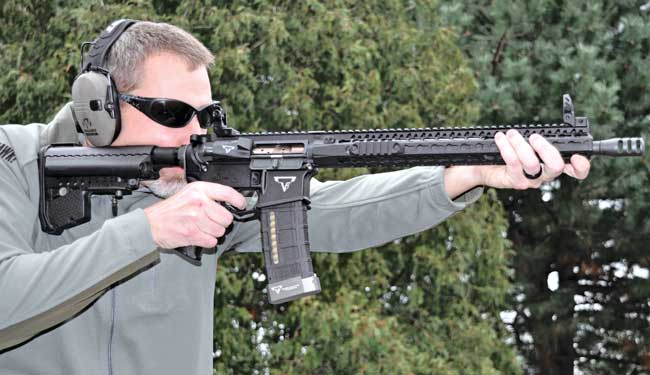
Have you ever wondered about how to use open sights on a rifle? Such a simple thing, and yet if you’re not familiar with firearms or are an all-out-scope person, then maybe you don’t even know what those little knobs on the front and rear of your barrel are!
Well, that’s okay, because in this guide we will show you what your open sights are, how to use them, and why they are an essential fail-safe for targeting with your rifle. There are only a couple of things you need to get started.
Items Needed For This Tutorial
Eye Protection – Proper safety glasses are a must anytime you are shooting. One little accident can maim you for life, so don’t take the risk of not using them.
Ear Protection – Either ear plugs or ear muffs will work fine. Rifles are loud. Short-term exposure and you’ll get that deafening, annoying ringing in your ears while with long-term exposure you could be facing hearing loss. Again, don’t take the risk.
Target – You can make cheap ones by simply drawing your bulls-eye, or print one off-line. At first, you definitely will want a target that has some kind of bulls-eye or points so you can see where you’re shooting. You can zero at whatever range you are most comfortable with. Generally, open sights are not for long range, so some people zero at only 50 yards while others may be shooting at 300 yards.
Your Rifle With Iron Sights – There are lots of different styles of iron sights out there. You may already have some equipped on your rifle, or have picked out and installed new ones, but shooting with them is pretty much all the same process.
Screw Driver or Multi-tool – Most open sights can be adjusted. Some are finger adjustable, while others require a corresponding tool to make your windage and elevation adjustments.
How To Use Open Sights
Step 1) Target Set-Up
Set up your target at you’re preferred range. I personally like to set up at between 50 and 100 yards when shooting with open sights, but it’s all personal preference here. Be certain that your target is in an appropriate safe area, with a good bullet stop behind it. Either a shooting range or an area out in the woods with a hill behind it should work great. Don’t forget to put on your eye and ear protection before you start.
Step 2) Shoot It!
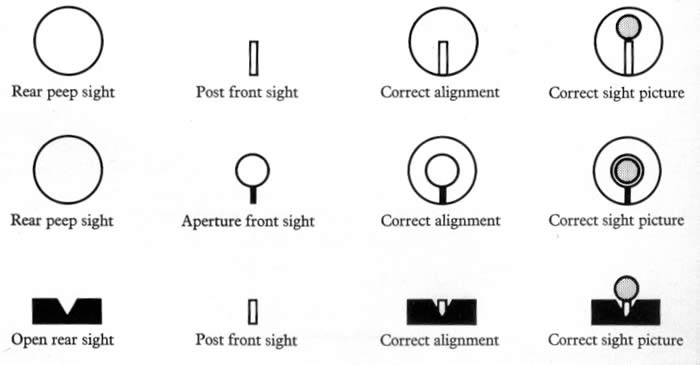
You’re pretty much ready to shoot. There are three main types of iron sights: open, aperture and bead types. Open is your basic post style where there’s a U shape or two posts for the rear sight, closest to your eye, and a single post at the end of the barrel.
Aperture is the style where there’s a peephole or a ring to look through and another ring at the barrel end, and there may or may not be a single post inside of it.
Bead is mostly found on shotguns and is literally a bead on the barrel end. Usually, the rear sight would be short posts.
Application is super simple: raise your gun to where you can clearly see through the rear posts or ring and line up the front post, or ring, directly in the center. For a ring, you should “circle” your aiming point. For a post, place the center (front) post directly on your aiming point with the point sitting right on top of the post.
When you shoot, you want to focus on your front sight, making sure it is aligned properly.
Step 3) Adjust As Needed
If adjustments are needed, zeroing is a simple process. Your front sight is stationary so you’re just dealing with your rear sight. Whether finger adjustable or if you need a tool to turn the screw, it’s the same principle. Turn the appropriate direction to adjust your windage (left and right) and elevation (up and down). Now do some more test firing and see if you’re hitting your bulls-eye. If you are, success! If not, readjust and try again. You should be able to place your shots where you want very quickly.
Common Questions
What kinds of open/iron sights are there? – There are several different kinds to choose from, though they all fall into three basic categories: open, aperture and bead. Open is the style where you line up the front post in the center of the rear posts. Aperture is the style where you sight through the holes or rings of the front and rear sights. Bead is the style where you center the front bead between the rear notches.
Can I use open sights if my rifle has a scope? – Yes. Your open sights are the perfect fail-safe for if your scope or other style sight fails you. You can use it for co-witnessing an optic sight, where you line up both your optic sight and open sights on the target together and use it for a confirmation that you’re properly zeroed. You can also get these cool mounts called see-through rings. They have an opening under where your scope locks in so you can view your open sights.
Is there an advantage to using open sights over a scope? – There are several advantages. Open sights are lower profile, lighter, much more durable and less susceptible to the elements, cheaper, and stay zeroed better. Most will suggest that you practice with both. Even if you are partial to scopes, it’s nice to have that constant back-up.
Conclusion
We hope you have found this guide on how to use open sights on a rifle useful. By following these easy steps and practicing, you will be well on your way to shooting dead-on with any iron or open sight you choose to use!
If you enjoyed this article you’ll probably like these: