Mounting a scope is easy and straight-forward. Install the rail base, bottom rings, scope, then top rings and you’re done, right? So simple. And yet, something’s still just not quite right. You very well may have forgotten to level your scope.
Your scope may look perfectly aligned, but without being properly leveled you could run into some problems. Even the slightest rotation will throw off your reticle, and windage and elevation adjustments, leaving you frustrated and blaming the scope as faulty. This is a quick and simple fix. Follow along with this guide and we’ll show you how to level a scope on a rifle.
Some Things You Will Need
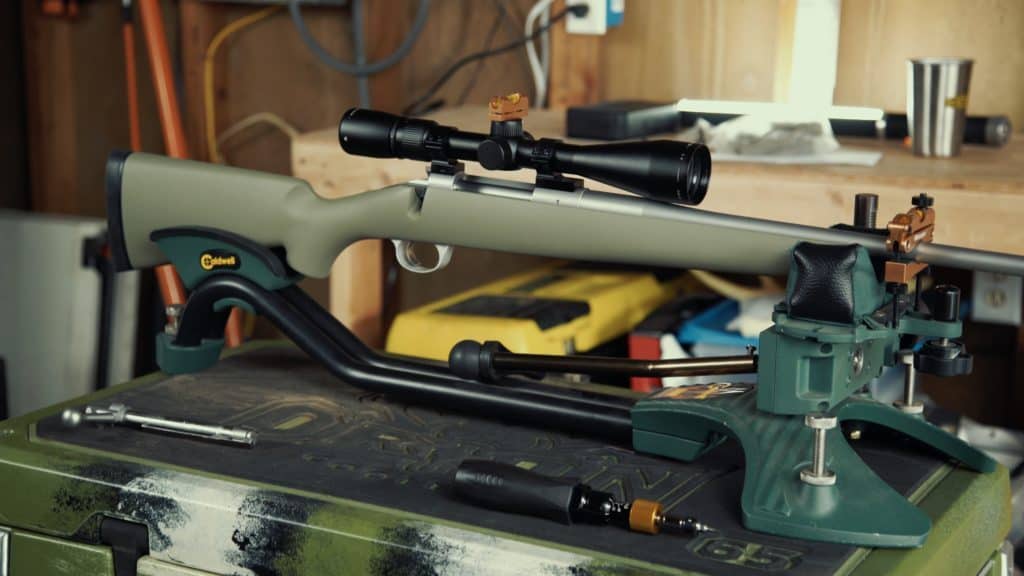
Rifle – You need the rifle that you are going to mount your scope on. Preferably, this rifle has a flat surface directly on top in the twelve o’clock position. Rails work great, as long as it’s a flat surface to place a level on.
Rifle Rest Or Cradle – Use a rifle cradle to hold your rifle upright and steady so that you can work and get everything leveled properly.
Scope With Rings – The scope of your choice with its proper rings.
Proper Tools For Tightening The Rings Down – Whichever Hex wrenches you need for tightening your scope rings down.
Small Bubble Or Spirit Levels – You will need 2 of these: one for the rifle and one for the scope. You can get tiny little levels with a magnetic back. These are the best to use for this kind of project. A regular level will work, but these little guys make it much faster and are cheap, convenient little additions to your toolbox.
How To Level A Scope On A Rifle
Keep in mind that what we are talking about here is leveling the actual scope to the rifle, not just the reticle. Your scope and rings are round and sometimes even though it looks level and perfectly set on your rifle, it may have rotated ever so slightly while tightening down the rings.
This can throw off your reticle and even the way the elevation and windage adjustments are made. So, what we’re going for here is making sure that the elevation knob is completely vertical and level against the twelve o’clock positioning of the rifle.
Step 1 – Secure The Rifle In The Rest Or Cradle
Make sure your rifle is unloaded. This should always be the first thing you do for safety’s sake whenever making adjustments like this. Place the rifle in the rifle rest so that it is sitting upright. Now you can adjust the rifle into a level position and secure it in place so that your hands are free to work on the other adjustments.
Step 2 – Secure Lower Scope Rings
Place the lower halves of the scope rings on the rails and secure them down tightly. These won’t move now, they are in place.
Step 3 – Scope And Upper Rings
Place your scope and upper rings over the lower rings. You will want to tighten the upper rings slightly, enough to hold the scope in place but loosely enough to be able to easily rotate your scope as needed.
Step 4 – Level Rifle And Scope
Place one of your small, magnetic levels on the rifle. The best place is if there’s room on the rail or a flat cap on the barrel in the twelve o’clock position. Adjust the rifle in the rest until the rifle is reading level. Now place the second level on the elevation knob. You may have to take the cap off first so that it’s on a flat surface.
Step 5 – Make adjustments
Now that the levels are in place, start to rotate the scope slightly. You want to match the level on the scope to the level on the rifle. Keep rotating until the levels indicate that the scope and rifle are matched up.
Step 6 – Tighten Down Scope
Once the scope and rifle are level to each other, tighten down the upper rings carefully, watching the level as you do it. Sometimes tightening can cause another slight rotation. Once your rings are fully tightened down and your scope is not going anywhere, you have successfully leveled your scope!
Common Questions
What may be a sign that my scope is out of level? – Consistently shooting too far to the left or right can be an indication that your scope is out of level.
Which is better, the bulls-eye level or the bar style? – Both are great and one is not better over the other. The bar style is a little bit more common. I have never personally tried the bulls-eye style, but it looks very user-friendly and accurate.
What if there is no flat spot on my rifle? – You may have to use a different style of level. There is one that fits in or clips to the receiver that will put you in level as well.
What if I level the scope and the reticle is still off? – If you have leveled the scope to the rifle and are still have problems, then it very well may be a problem with the scope itself. If this is the case, hopefully you have some kind of warranty on your scope and can send it back to the manufacturer for repair or replacement.
Conclusion
I hope that you now feel comfortable with how to level a scope on a rifle. It’s not difficult but is a step you really shouldn’t skip. Having a rifle scope that is not level can be really frustrating, especially if you don’t know what the problem is.
Thankfully this is such an easy fix and easy to check for. After the scope is leveled, take it out and practice shooting to be sure you’re not having any other issues. With the problem solved, have fun sighting in your rifle for hunting season!
If you enjoyed this article you’ll probably like these: