You may have heard of shimming from a construction standpoint; shimming a door or window. Did you know you can shim a rifle scope? It’s not the best solution but it works for a temporary fix. You may need to use this technique if your scope gets severely knocked out of alignment before a hunt or, in the case of airgun shooting, you’re up against a case of barrel droop.
What is shimming? Shimming is when you place a thin piece of material between the scope and the rear scope ring to increase the elevation that you can’t adjust for with the scope adjustments and better align your scope with the barrel. Follow along with this guide to learn exactly how to shim a rifle scope.
Some Things You Will Need
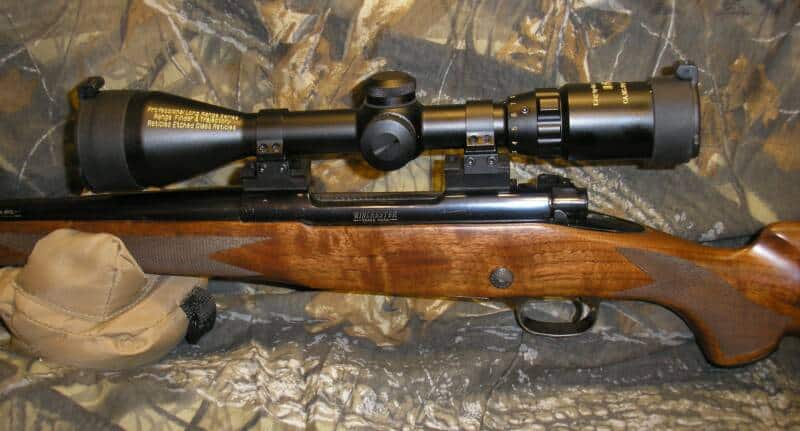
Mounted Rifle Scope – Shimming is kind of an emergency fix, so if you are using this technique, you probably already have your scope mounted to your rifle. If it’s not, then the better way to fix an elevation alignment problem is to use adjustable scope rings or a special elevated mounting base. Shimming can damage your scope, so it’s not the best, nor long-term option.
Hex Wrenches – You will need to have these to remove your scope from the scope rings. It’s probably a good idea to carry some of these in your rifle case or hunting pack just in case of an emergency.
Very Thin, Sturdy Material – There are many materials that will work in a pinch for shimming. The key is that they have to be thin. Business cards, thin, laminated cards, aluminum pop cans, etc. The material type doesn’t really matter. It can be aluminum, paper or plastic. Something as thick as a credit card is way too thick. Try to keep it very thin, and stiff, but pliable.
Scissors – Ideally, you want some scissors to cut your material to the proper size, to fit between the scope and rear scope ring.
Small Level – Another tool you may want to carry in your hunting pack just in case. This is to check that the scope is re-mounted properly and level when you are finished shimming.
How To Shim A Rifle Scope
Remember that this is only an emergency or temporary fix. You really don’t want to have too many shim layers if you can help it as it will cause damage to your scope and possibly make it more unstable. One or two layers only is best. If you need more, be sure to decrease your shims in size to better cradle the scope and line up to the other shims when layered.
Step 1 – Select And Cut Your Shims
Whatever you want to use for shims or have on hand. Aluminum pop cans work great and form to the scope rings easily. Cut them out small enough to fit snugly into the bottom portion of the back scope ring. If you are using more than one, cut the shims a little smaller each time so that they will line up together when layered and cause minimal damage to the scope.
Step 2 – Remove Scope From Scope Rings
Remove your rifle bolt. Then use your hex wrenches to remove the scope from the rings. Keep the bottom portion of the rings attached to the rifle.
Step 3 – Place Shims
Place your shims with the largest inside the rear scope ring and gradually layer accordingly. You should only need one or two shims. If more are needed, make sure you know approximately how far the shims will alter your shot per 100-yards.
Step 4 – Re-mount The Scope
Gently place your scope back onto the rings and shims and carefully tighten back down. You want to tighten these down slowly and evenly so as not to cause damage to your scope when it pushes down on the shims. Make sure the scope is nice and tight so it doesn’t move around due to recoil.
Step 5 – Check For Level
Double check with your level to make sure the scope is level and one side is not tightened more than the other. Your want your shims sitting completely even.
Step 6 – Sight in
Now that it’s all back together, you want to test fire and zero your scope to make sure the shims are going to work for you. If you can zero the scope, success! You are ready to hunt. If not, repeat the steps adding more or less shims as needed. This is only a temporary or emergency fix, so be sure to get the correct equipment to properly fix your mount when you are able.
Common Questions
Why would I need to shim my scope? – Sometimes your scope may be knocked very far out of alignment somehow. You wouldn’t necessarily be able to fix this properly if you were, for instance, traveling for a hunting trip or competition. Another reason may be for barrel droop on an air rifle. This is where the barrel actually droops and points in a different direction from the reticle.
How many shims do I need? – This depends on your shim material thickness. A pop can shim would add approximately three to four inches per 100-yards per shim. Other materials may have slight differences but should be fairly similar as long as you don’t use something too thick.
Conclusion
You now know how to shim your rifle scope in a pinch. Hopefully, this guide has been helpful to you in gaining the knowledge of performing this technique, but I hope you don’t actually have to use it. Having to do this means that something is screwed up and again, shimming could actually cause damage to your scope. However, if you do end up using this guide, I hope it saves your hunt or competition! Damaging or no, this may be the exact method it takes to quick fix your rifle and get you back on target.
If you enjoyed this article you’ll probably like these: